Yamaha YXZ Sway Bar Install Instructions

1. Remove stock rear sway bar and save the stock bushing and clamp (to be re-used). 2. Remove stock bed. Note: install can be done without completely removing the bed, but removing it makes it much easier. Heat shield must also be loosened/removed. 3. Install Bracket Clamps “A” and “B” over the frame tube members, one side at a time. 4. Install Bracket “A” using provided Grade 8 Bolts, washers and lock nut (the X bracing should face up and be on the outside corner). It is suggested to run bolt thru the Bracket “A” and put nut on top of Bracket Clamps “A” and “B”. This provides a cleaner install and also much easier to install if bed is not completely removed.
5. Install Tailing Arm Clamps “A” and “B” to each side using provided Grade 8 Bolts, washers and lock nuts. These brackets should be placed on trailing arm and mounted as far towards the back as allowed.
a. Note 1: If using stock Wheels, the tires will clear, but there is not much clearance. It is not recommended to run stock wheels.
b. Note 2: If using trailing arms other than stock (ie. Long Travel), we will provide a mount to be welded instead of clamped.

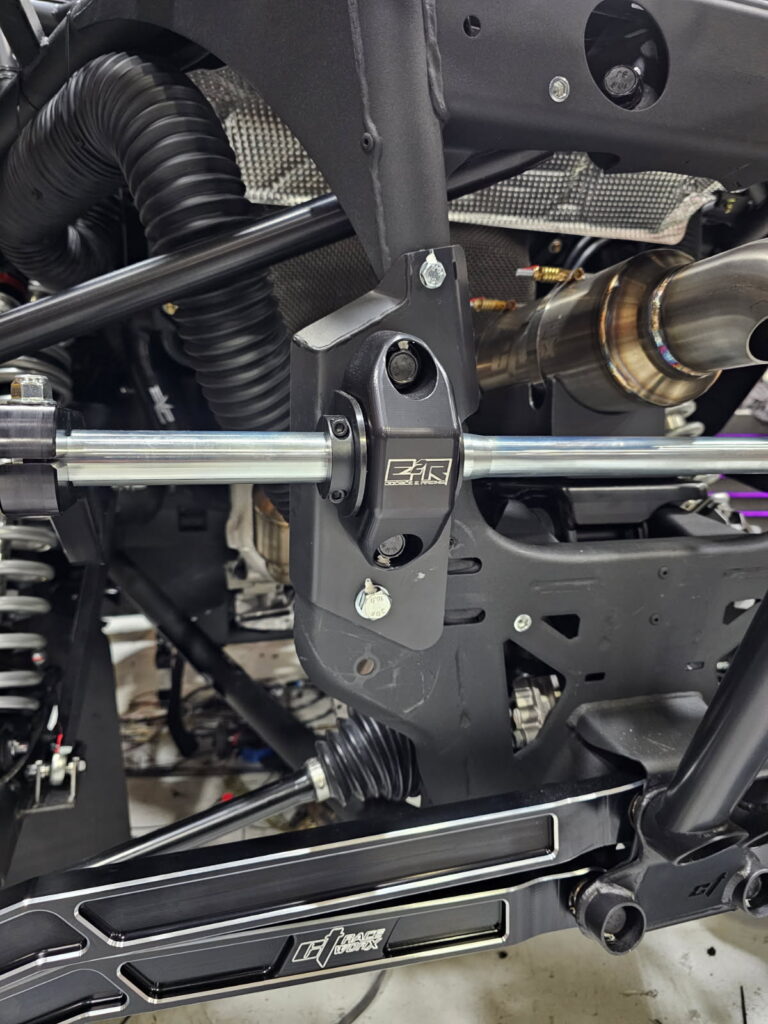
6. Use the stock bushing and clamps, mount the sway bar to Bracket “A”. Do not tighten bolts. 7. Slide provided spacer and shaft collar onto each end of sway bar.
8. Center sway bar.
9. Tighten sway bar clamp bushings
10. Slide spacer and shaft collar against clamp bushing and tighten.
11. Install sway bar arm and tighten with provided bolts.
a. Note: after first ride, re-tighten bolts and periodically check.
12. Install safety hitch pin.
13. Mount provided Link arms to Trailing arm clamp “A” and to sway bar design hole (see figure 1). Tighten lower bolts on trailing arm, but leave sway bar bolts loose.
14. Air all 4 tires up to same pressure (15 psi suggested) and make sure YXZ is on a level surface. 15. Make sure both link arms are as short as possible and tighten one side to the sway bar arm. 16. Install bolt on other arm and adjust link rod as required to where bolt slides in and out with no pressure.
17. Tighten bolt.
18. Go ride. If sway bar needs to be stiffer, move link arms toward the rear and repeat steps 14 – 17. If sway bar needs to be softer, move link arms toward the front and repeat steps 14-17.
Read More